
You may realize that lists are being exhausted in software systems or in our daily lives. It may be due to its excessive need or usage, we don’t pay enough attention towards it.
My personal experience, I have created list view program many times and out of those mostly I have copied it from some existing source without paying much attention to details.
It may sound a surprise to you that, this time when I tried to create list view program in Android Application. I didn’t copy it, rather, I decided to create one tool which could generate source code in few simple steps and I could save plenty of time and move my attention towards more tedious parts of the project.
I guess that’s the same reason you are here. I will explain how you can generate your pre-compiled bug free recyclerview source code in no time using ‘Code Generator‘.
To get your basic application running including your data Addition, Modification, Deletion and Get/Search features, you don’t need to write single line of code. All of the Frontend as well as backend will be generated using ‘Code Generator’.
In no time it can generate thousands of lines of code. You get the clean source code which will look professional and formatted in a way that every Software Industry demands.
Before we dive into creating source code for recyclerview, you need to create your database helpers. If you haven’t done that before I would suggest you to go through this blog post and once you are done, please come back to this page and continue further.
Let’s do it…
Launch ‘Code Generator’ Android application.
If you haven’t installed the application as yet, please refer to the link here.
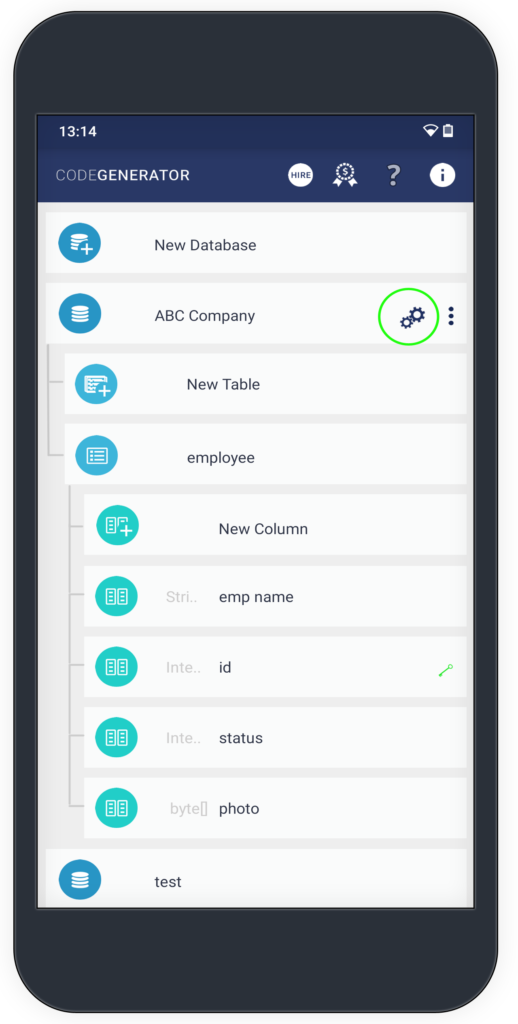
– Tap on your database name, in my case its “ABC Company”.
As soon as you tap on your database name, generate icon should appear as it is marked with the green circle in the image.
Tap on this ‘Generate’ icon.
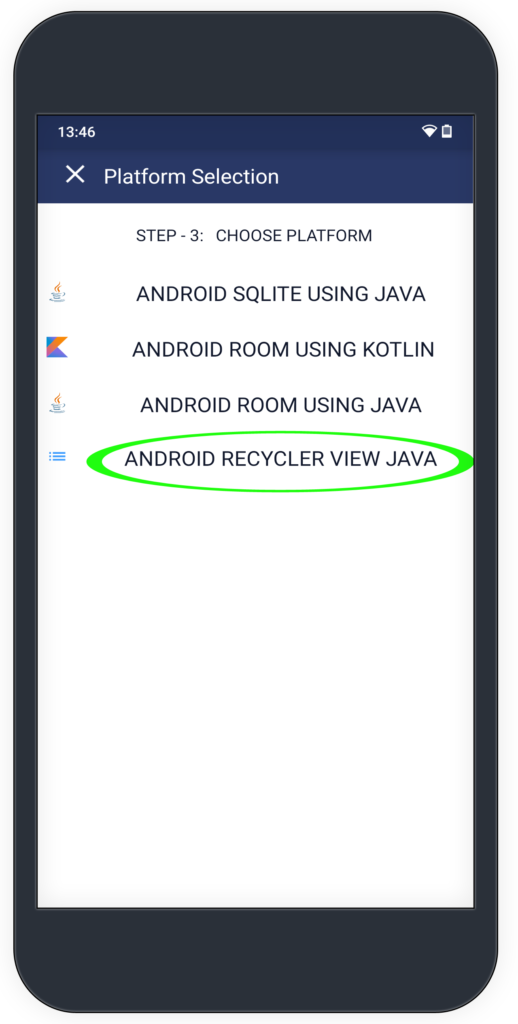
– Choose ‘ANDROID RECYCLER VIEW JAVA’ option from the screen.
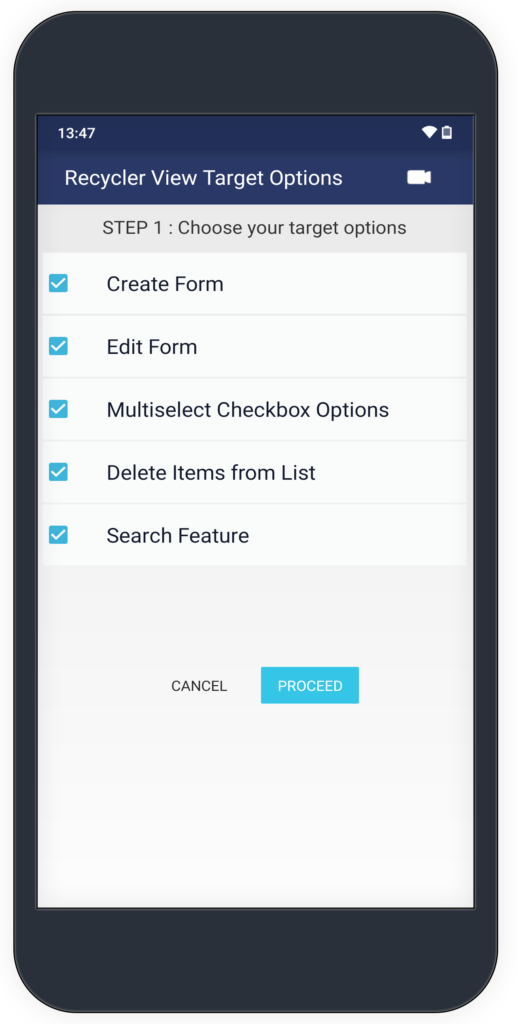
– You can enable/disable your target options using this screen.
Lets understand what each option is going to perform.
Create Form
Create form is the option which is required to create new entry in a list view.
Edit Form
Edit form is used to bring edit screen while tapping on the list item.
Multiselect Checkbox Options
This option is required when user wants to perform single operation on all the items, for example : Delete Operation, etc.
If this option is enabled, source code to perform long press anywhere on the screen will be added.
Delete Items from List
Enable this to add delete functionality in the recyclerview
Search Feature
Enable this to add search feature on top of recyclerview screen
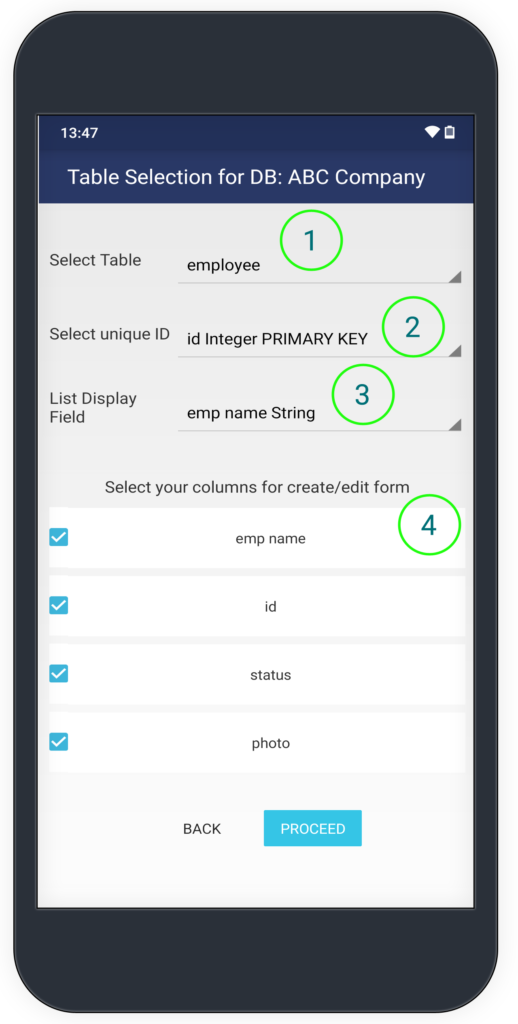
– Using given screen you can choose the database table for creating recyclerview source code.
Please refer to the highlighted green marks :
1. Select Table Option :
Choose your desired table for generating source code.
2. Select Unique ID :
Choose unique column from the drop down which shall be utilized to pull/push the information into your database.
3. List Display Field :
Choose column from the drop down which shall be utilized to identify the item in the listview or recyclerview.
4. Select your columns for create/edit form :
If you are generating code to perform Add or Edit operations from your recyclerview. Using this screen you can control the number of fields to be displayed while adding or creating the form.
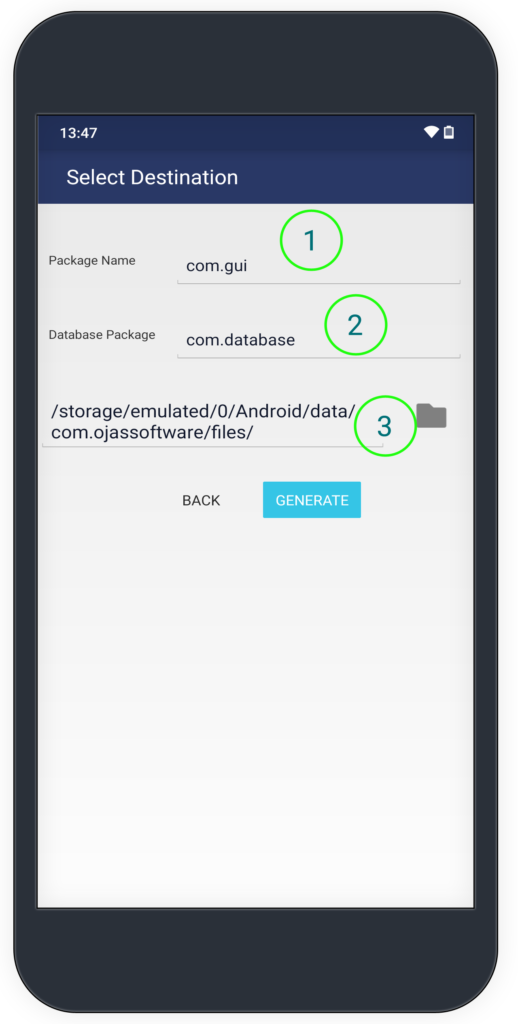
– Select your destination options using this screen
Please refer to the highlighted green marks :
1. Package Name
Choose your desired package name where recyclerview source code should be placed.
2. Database Package
This shall be the package name you might have used while creating your database helpers. You can refer to this link if you haven’t done that as yet.
3. Storage Location
Choose the location you need your generated code to be stored at.
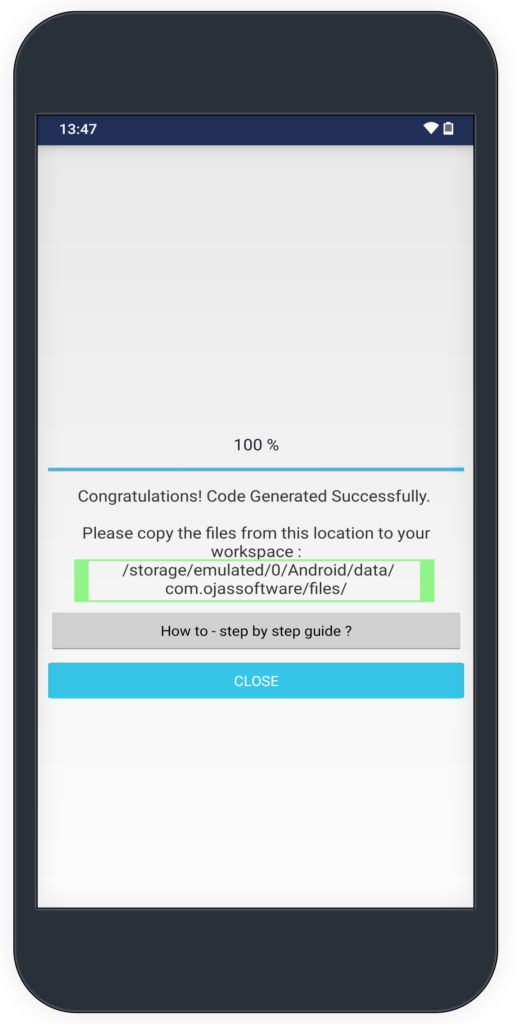
– Your source code has been generated to the given location.
Further you need to copy these files from this location to your workspace
Integrate generated source code from your device to workspace
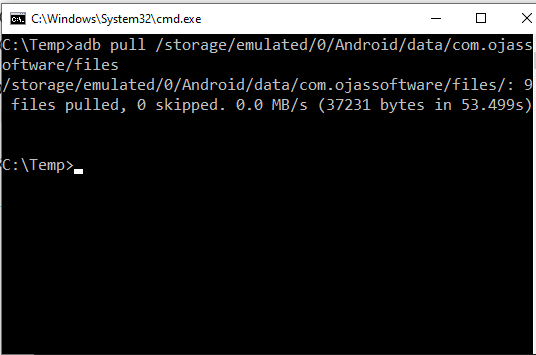
1. Copy the files from your device using ADB Command
2. Copy directly using Android file manager
ADB Command
adb pull /storage/emulated/0/Android/data/com.ojassoftware/files
Example : C:\Temp>adb pull /storage/emulated/0/Android/data/com.ojassoftware/files
In my case the files are stored into “C:\Temp” location of your computer system as shown below in the image.
Two folders and one reference file shall be created as shown in the image.
1. java folder
It contains all the java files generated for recyclerview frontend/backend.
2. res folder
It contains all the layout or xml files generated to handle recyclerview GUI.
3. manifestTemp.xml
You need to define all the activities in your manifest file. Copy the lines and paste inside your manifest file.

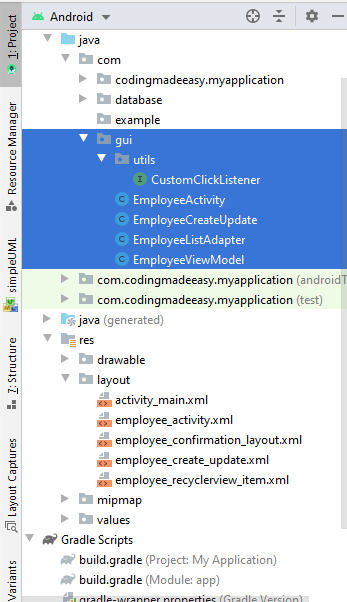
Drill down java folder and copy “com” folder inside your workspace java folder. Alternatively, you can copy all the files into Android Studio workbench directly.
Similarly, open up “res” folder and copy layout files into your workbench “layout” folder.
Build/Run the project
Your source code for recyclerview is integrated and ready to run, you may need to build the project. If you face any compatibility related issues, you may need to refer to the “gradle_Reference” file which is dumped into the same location. It should contain the set of libraries which are required to run this project. Compare this with your gradle file and make changes accordingly.
Conclusion
We have tried to reduce the coding efforts which every software developer puts on things which are repetitive and more error prone, so that the focus should go into more tedious parts of the process rather than generic features.
If you still face any issues with ‘Code Generator’, please write us in the comment box below.
If you need to know how to build your project, please refer to this link here.