Generate Kotlin Android Application
This guide will help you generate kotlin android application in few easy steps using ‘Code Generator’.
Let me clarify the term ‘Kotlin Android application’, here we are trying reduce the software coding efforts which goes in writing the generic stuff for your android application. You might end up spending more time in performing these tedious repetitive tasks and bug fixing.
This guide will help you generate the source code for following features without writing single line of code:
1. Source code to insert data.
2. Source code to edit data.
3. List view in Recyclerview.
4. Recyclerview multiple select option.
5. Delete feature in recyclerview.
6. Search feature in your recyclerview.
7. Database interfaces in Room using Kotlin Android.
7.1 Add data API.
7.ll Modify data API.
7.lll Delete data API.
7.lV Get data API.
By utilizing all these features you will have an android application performing Addition, Modificaton, Deletion, Get and Search operations in your target product in few simple clicks.
Let’s begin..
You need to perform these simple steps :
Step 1 : Generate the Source Code.
Step 2 : Import the generated Kotlin Android files into Android Studio.
Step 3 : Run the Application.
Done!!
For creating your data structure you can refer to the step-1 of this guideline here.
Step 1 : Generate the Source Code
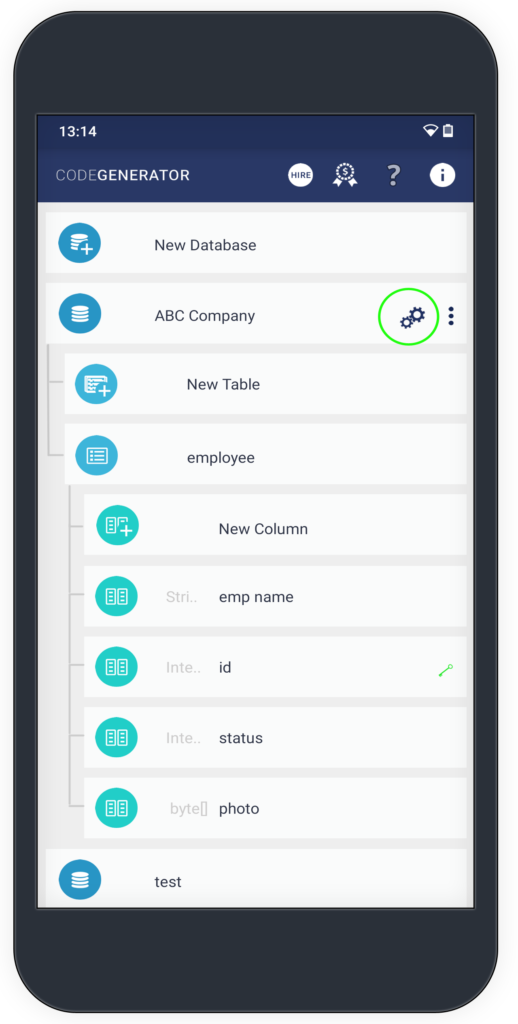
Click on the generate source code icon as highlighted with green circle in the screenshot.
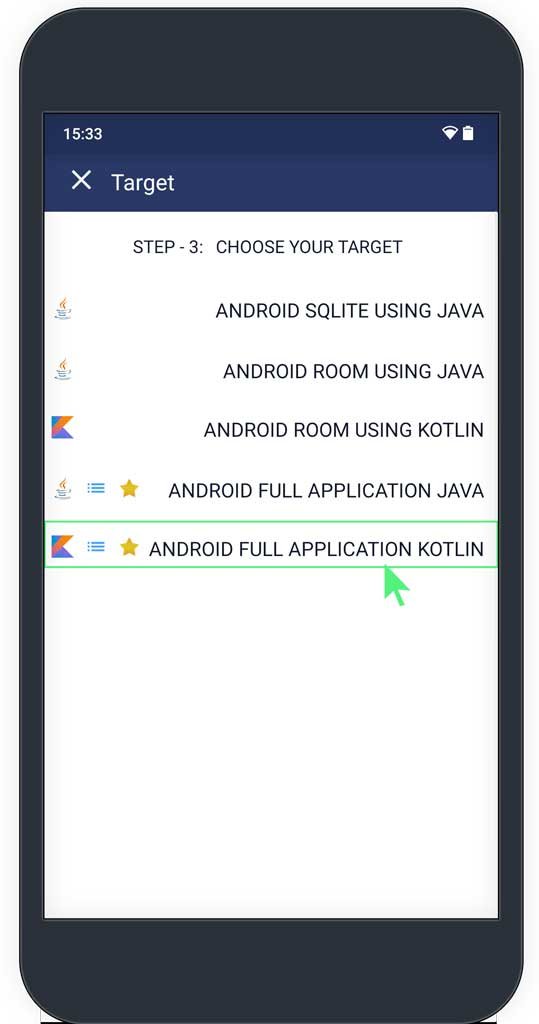
Choose your target as ‘ANDROID FULL APPLICATION KOTLIN’.
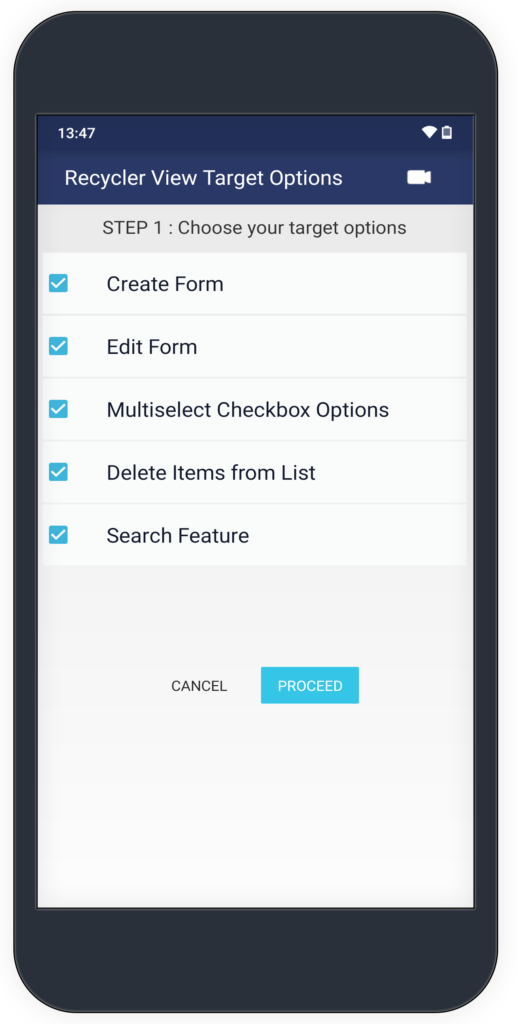
Choose your target options.
Let’s understand what does these options mean and what will happen if you enable/tick any of them.
Create Form
Enabling create form will attach/generate the source code for creating new entry in a list view and a bottom right plus icon which is going to launch fresh form for creating new item and to save the save into your database.
Edit Form
Edit form brings the source code for edit screen. Single tap on a list item takes the clicked item in edit mode.
Multiselect Checkbox Options
This option is going to enable user to perform single operation on selected multiple items, for example : Delete Operation, etc.
If this option is enabled, source code to perform long press anywhere on the screen will be added, which is further going to bring this multi select option highlighted.
Delete Items from List
Enable this to add delete functionality in the recyclerview.
Search Feature
Enable this to add search feature on top of recyclerview screen.
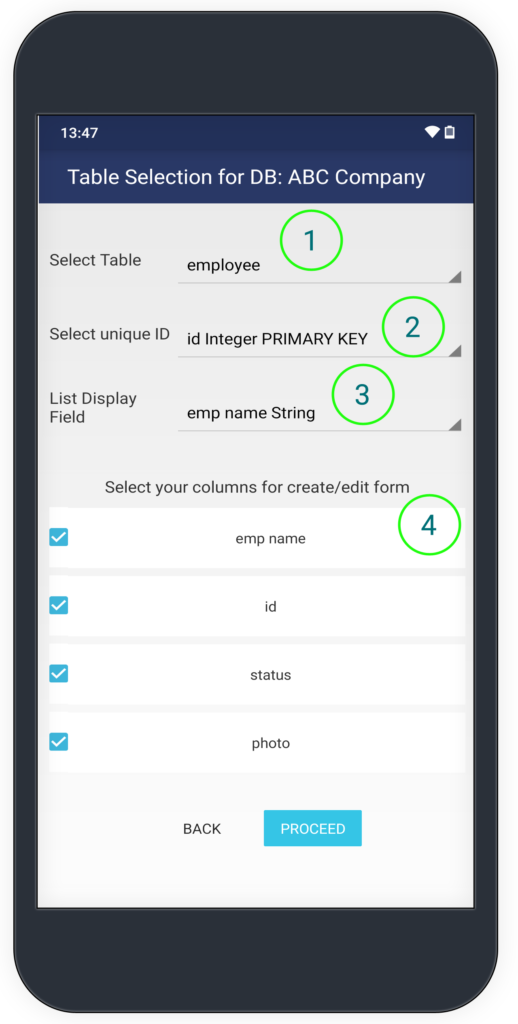
Please refer the image. This is your target table for the ADD, MOD, DEL, GET or SEARCH type of operations within Kotlin Android application.
Please refer to the highlighted green marks :
1. Select Table Option :
Choose your desired table for generating source code.
2. Select Unique ID :
Choose unique column from the drop down which shall be utilized to pull/push the information into your database.
3. List Display Field :
Choose column from the drop down which shall be utilized to identify the item in the listview or recyclerview.
4. Select your columns for create/edit form :
If you are generating code to perform Add or Edit operations from your recyclerview. Using this screen you can control the number of fields to be displayed while adding or creating the form.
Please refer to the image for the highlighted green circles:
Note : These options need to be chosen carefully, as mistakes can lead to compilation errors.
1. Package Name
Choose your desired package name where recyclerview source code should be placed.
2. Database Package
This shall be the package name you seek to use for your database helper classes.
2. Resource Package Name
This is the package name of your main or launcher activity which will be used to create the import package name of your resource files.
Make sure you append “.view.R” in this.
4. Storage Location
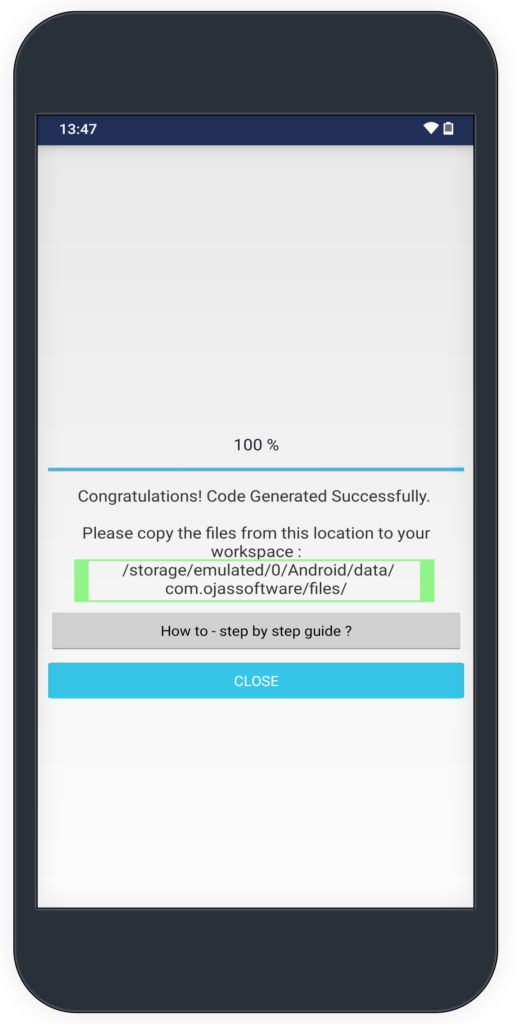
Choose the location you need your generated code to be stored at.
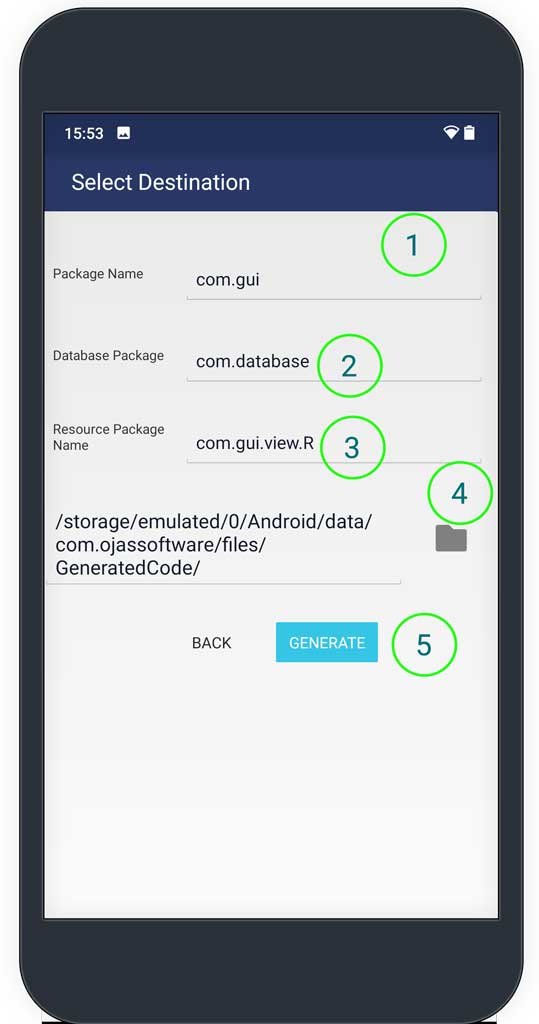
Further, you need to copy the generated source code files from this location to your android workplace.
Integrate generated source code from your device to workspace
1. Copy the files from your device using ADB Command
2. Copy directly using Android file manager
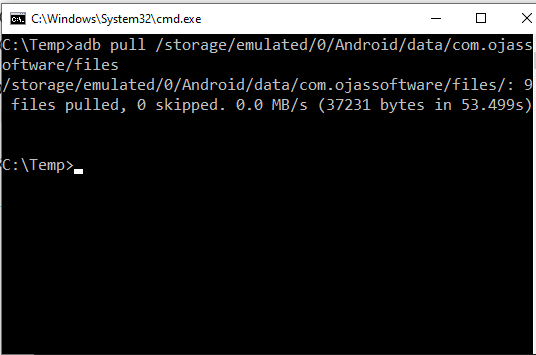
ADB Command
adb pull /storage/emulated/0/Android/data/com.ojassoftware/files
Example : C:\Temp>adb pull /storage/emulated/0/Android/data/com.ojassoftware/files
In my case the files are stored into “C:\Temp” location of your computer system as shown below in the image.
If you seek detailed guidelines on how to use ADB, please refer to this link here.
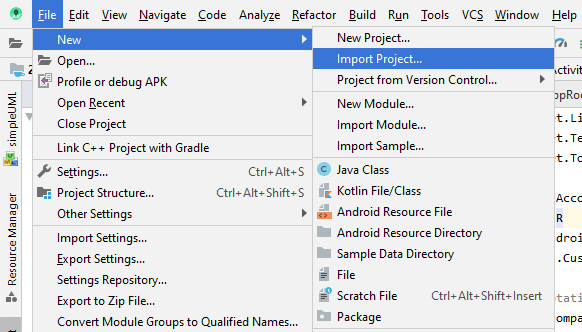
Step 2 : Import Generated Project into Android Studio
Launch Android Studio and import this as a new project. You can find a step by step guide here.
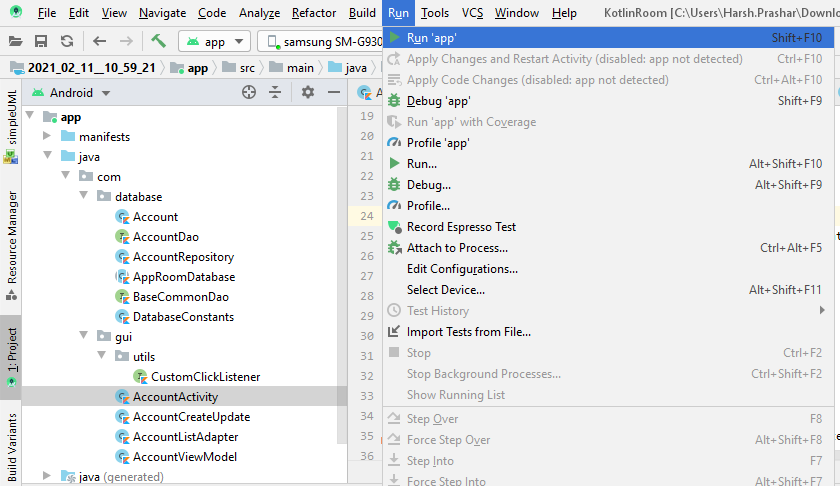
Step 3 : RUN the Kotlin Android Project
Run the project, it might take some time to finish.
Once your build is successful, it should launch new kotlin android application in your target device.
If you are still not sure on how to run your android application, please refer to the detailed guide here.